


 12 / 148

Electric Netting FAQs
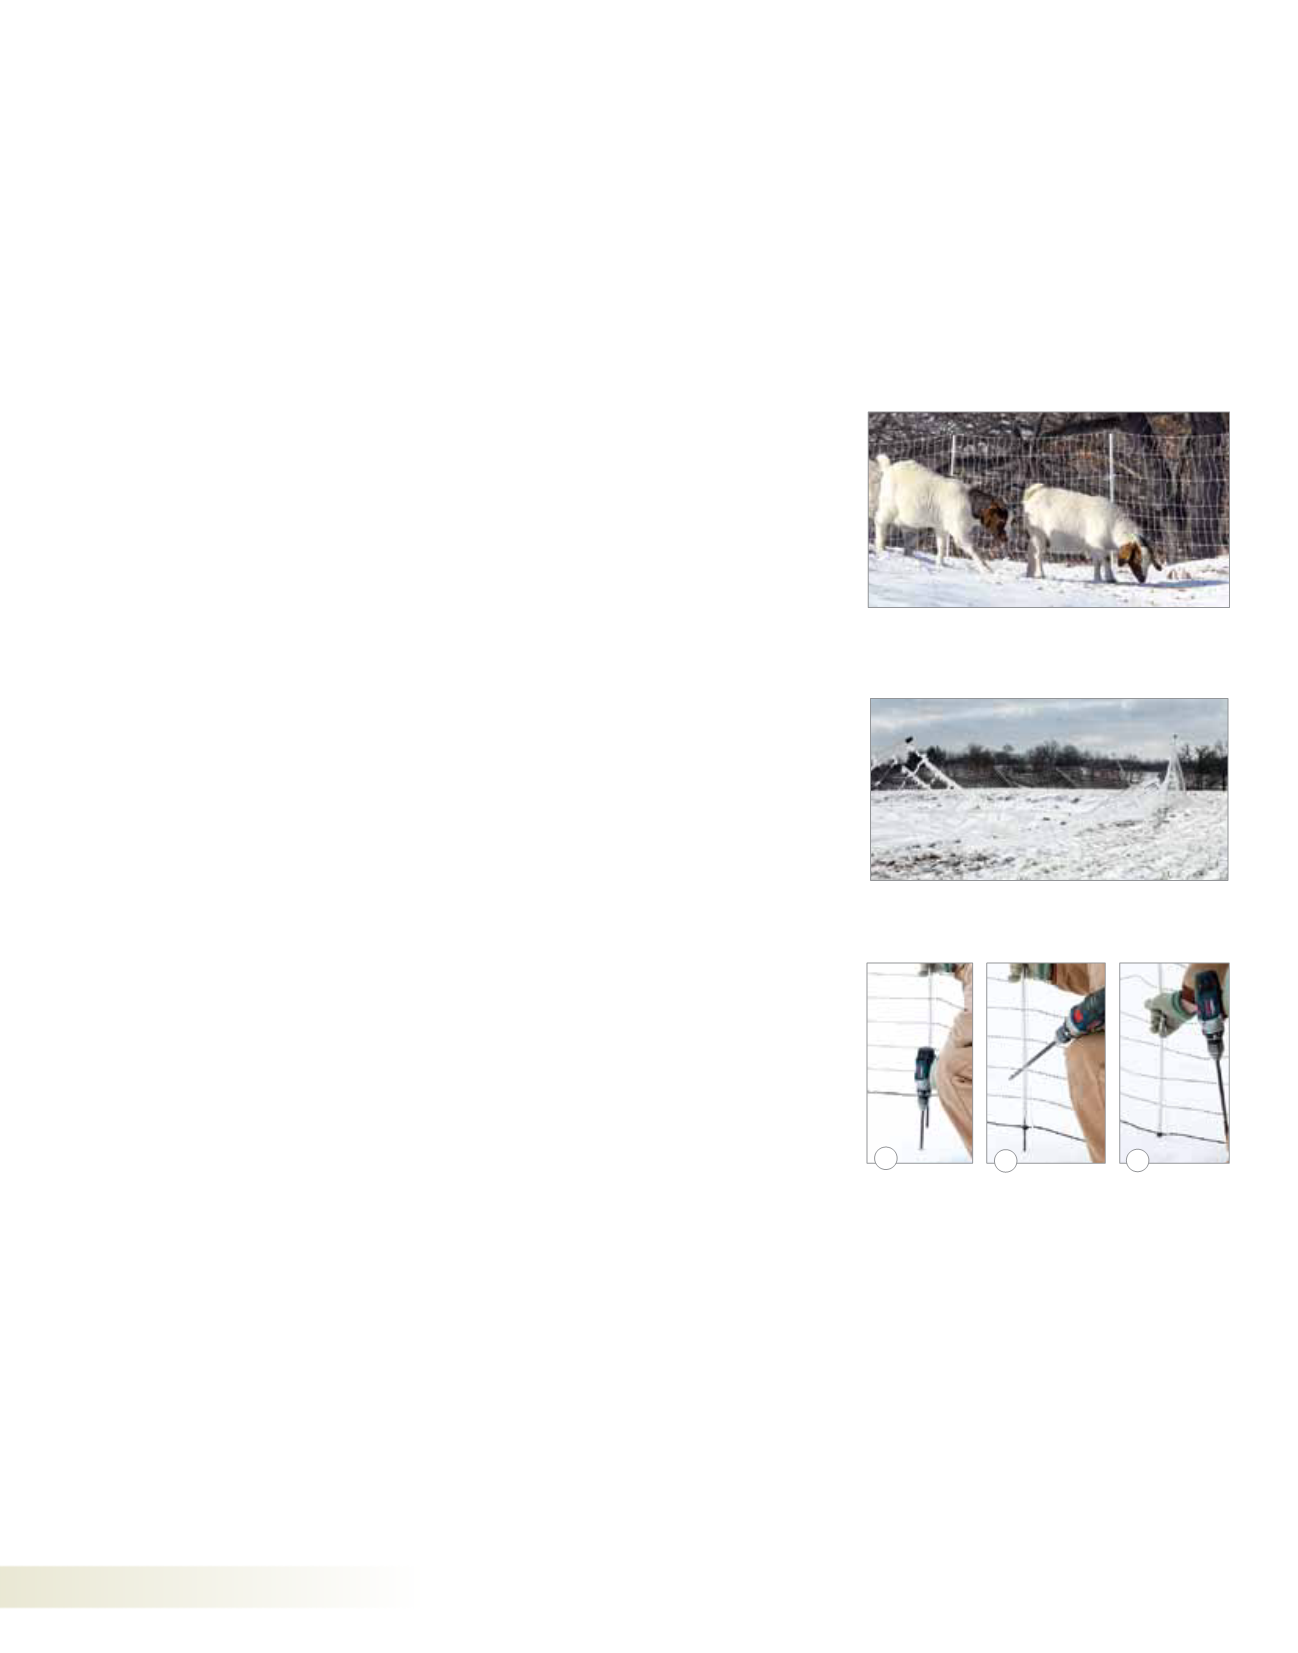
(above) Snow and a thick winter hair coat add
resistance. Make sure the energizer is up to the
challenge of such situations.
(above) Netting can be weighed down by ice or
snow. Add in support posts to take the weight.
Q. Can I connect 2 different types of
netting together?
A.
Yes. They all conduct electricity. But
some do this better than others.
Q. What about grass contact?
A.
It lowers the voltage of the fence. So:
1. When grass gets 6" high, mow
carefully
along
the fence. First turn off
the energizer! Do not mow into the
fence. Move the net into mowed strip
by removing and reinstalling.
2. Or spray herbicide in a narrow strip
under the fence. We prefer burn-down
chemicals that don’t kill perennial
vegetation. No herbicide lasts forever.
Vegetation will return.
3. Or buy an energizer large enough to
cope with the extra weed contact.
Q. What about fence energizers?
A.
For netting to be effectively used, it must
be electrified.
Most farmstore solar units
are too low in output to properly energize
a roll of netting
.
That being so, we offer
solar units that meet the higher output
needs of the net.
Q. Which energizer is right for you?
A.
If the fence is close enough to plug the
energizer into an outlet, use a plug-in
(AC/110V) unit.(
See p. 83.)
For fences far from an outlet:
a. DC/battery energizer. Needs a 12
volt battery that must be regularly
recharged. (
See p. 83.)
b.
PRS solar units (include energizer, battery and solar panel to recharge them plus connecting leads to ground stake and fence).PRS units (
See pp. 90–97)
are ready
to work within 5 minutes—just
place them, drive in the ground rod,
connect leads, switch on and test
voltage on the fence.
Q. Does the bottom wire have a charge?
A.
The ground strand of most (but not all)
nets is not conductive. The exceptions
are QuikFence Quick Ground nets
(see our website for details)
.
Q. How do I support it at corners?
A.
Two options:
1. Install a support post. (
See pp.
121–127.)
2. Or drive in a tent peg or T post
outside the fence at the corner. Use
nonconductive string to tie to the
netting post (at least 2" away).
Q. What if the net is too long? Should I
cut it?
A.
No. This will damage the net. It needs
both ends to work well.
The best way to deal with extra
length is to make a U–turn with the
net and install the excess alongside the
original net.
For Pos/Neg fences, make sure the
horizontal strands do
not
come in
contact with one another.
Q. How do I put in replacement posts?
Replacement clips?
A.
Copy the net pattern of an existing
post. Start at bottom of net and
interweave the new post upwards.
For clips, place the lowest all-black
strand in the replacement bottom clip
and slide it up the steel ground spike.
Then attach the top strand to the cap
on top of post.
Q. Some of my netting wires are being
chewed or cut. Why?
A.
The lower wires are not “hot” (enough)
to stop small rodents with poor ground
contact (mice, rats, rabbits) from
cutting them with their teeth.
Q. How do I fix a break in my net?
A.
Each net is supplied with a
repair kitcontainin
g brass ferrules,conductive
twine, post tops and bottom clips.
Use a fisherman’s knot
(p. 14).
(Look
online for a how-to on tying the knot.)
Clam
p brass ferrulesover the knot to
hold it in place.
Q. Why are some nets offered in kits
but not all of them?
A.
Because both buying and building
fences are complicated for those
without experience. New users tell us
that netting and energizer kits
simplify
purchasing decisions—
because there
are many netting options, support post
choices, energizers, ground rods, etc.
We know that:
1. Many already own an energizer.
If you’re not sure whether it will
work for our fences, contact us.
2. Many need longer fences and
larger energizers than suggested
in our kits. If so call us. We will
help you reach a solution.
3. Seeing helps. So look at our how-to
videos on our website to see how
to install and remove netting.
Q. How can I make my netting work
better in dry weather?
A.
1. Purchase a wide-impedance
energizer. They are more capable of
pushing electric pulses through dry
soil than low-impedance units.
2. Install longer ground rods. Added
12 NETTING FAQs
www.premier1supplies.com• 1-800-282-6631
c
b
a
To insert posts into frozen soil…
a.
Use a battery drill and 5/16" drill bit to make a
starter hole. A drill bit extension (as shown) is an extra
cost but kinder to aging backs.
b.
Once the hole is
made, insert the post.
c.
Make sure the post fits into
the hole and is secure in the ground.
Q. How does netting work in winter?
A.
1. Posts become frozen in the soil. To
release we clamp pliers on the steel
spike and twist. To insert a post into
frozen soil, use a drill (
see above)
.
2. Excess ice and snow can flatten
netting (as they will any fence).
3. Snow can act as an insulator and
reduce the strength of the pulse.
length reaches the damp subsoil.
3. Place the energizer’
s ground rodwhere the soil will remain damp.
4. Make the soil wet around the
energizer’s
ground rod. How? Make
a pencil-size hole in the bottom of
a 3 to 5 gal bucket. Set the bucket
next to
ground rod.Fill bucket with
water. The water will slowly seep
into the soil around the rod. Refill
every few days.